Shopify Stores in Chile: Step-by-Step Guide to Launch Your First Store from Scratch
Updated
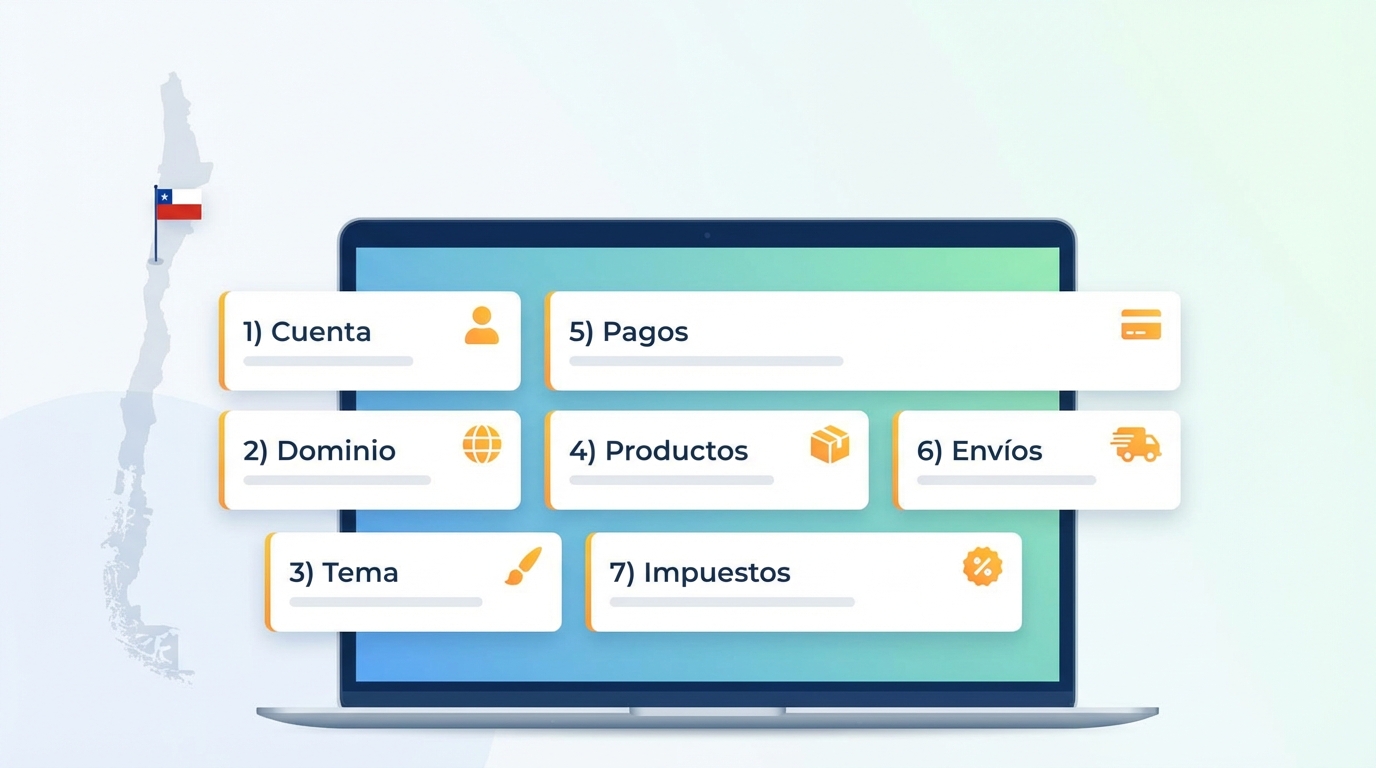
If you're in Chile and want to sell online, Shopify is one of the fastest ways to launch a professional online store. The problem is that, when you log in for the first time, the dashboard can be intimidating: Where do I start? Domain first, theme, or products? How do I set it up for Chile?
In this guide you'll see an organized step-by-step process, from creating your account to configuring products, payments, shipping, and basic taxes for Chile, leaving out only advanced tax topics (SII, receipts, and invoicing, which you can see in our legal article).
What You'll Achieve with This Guide
Process summary: To launch your first Shopify store in Chile you need to create a Shopify account, choose a plan, and configure the basic business information. Then, pick a domain (ideally .cl or .com), select and customize a theme, upload your products and collections, and configure payment methods, shipping, and taxes with 19% VAT focused on Chile. Finally, place a test order before opening your store to the public.
Who This Guide Is For (entrepreneurs and SMBs in Chile)
This guide is designed for:
- Entrepreneurs who have never used Shopify.
- SMBs looking to move from selling on Instagram/WhatsApp to having their own store.
- Chilean businesses wanting a solid basic setup before investing in traffic or advertising.
You don't need to know how to code; Shopify is designed so you can build your store with a visual interface.
What the Basic Setup Includes and What's Left Out
Here you'll see:
- Create an account and choose a plan.
- Set currency, timezone, and language.
- Define your domain.
- Choose and customize a theme.
- Upload products and collections.
- Configure payments, shipping, and basic taxes.
Step 1: Create Your Shopify Account and Choose a Plan
Initial Registration and Free Trial
Go to shopify.com and click "Start free trial". Register with your email address and answer the basic questions.
Shopify creates a trial store with a subdomain like yourstore.myshopify.com. With the free trial you can explore the dashboard, upload products, and design the store.
Choosing the Right Plan for Your First Store
For SMBs just getting started, the Shopify Basic plan is usually enough. It allows you to sell online, use the full store, and connect payment gateways. Higher plans add advanced features, but they're not necessary at the start if you're validating your business model.
Step 2: Initial Settings for Chile
Configure Country, Currency (CLP), and Timezone
As soon as you create your account:
- Go to Settings > Store details.
- Set your country to Chile.
- Configure the currency to Chilean pesos (CLP).
- Set the timezone to Santiago, Chile.
Why Does This Matter?
This affects how prices are displayed, the timestamp on orders, and consistency with your reports and accounting.
Store Language vs. Admin Language
The admin can be in Spanish. The store (what the customer sees) can also be in Spanish through translations or localized themes. Decide from the start if you'll only sell in Chile in Spanish.
Step 3: Choose Your Domain for Chile (.cl or .com)
Trial Subdomain vs. Custom Domain
By default, Shopify gives you something like yourbrand.myshopify.com. It works for testing, but it's not the professional face you want to show your customers. To sell seriously, you need a custom domain.
Buy and Connect Your Domain to Shopify
You have two routes:
- Buy the domain within Shopify: Simpler, Shopify handles DNS and SSL.
- Buy an external domain (.cl from NIC Chile, GoDaddy, etc.): Then point it to Shopify.
If you sell only in Chile, consider a .cl or a short, easy-to-remember .com. Once purchased, go to Settings > Domains and follow the instructions.
Step 4: Choose and Customize a Shopify Theme
How to Choose a Theme
In Shopify's Theme Store you'll find free themes (like Dawn, fast and flexible) and paid themes. To start, free themes are sufficient for most SMBs.
Basic Customization
From Online Store > Themes > Customize:
- Upload your logo.
- Adjust colors to match your brand identity.
- Choose readable fonts.
Minimum Pages You Should Have at Launch
Besides the home page, create at least:
- About Us / About the Brand.
- Shipping and Returns Policy.
- Contact.
- Basic Terms and Conditions.
Step 5: Create Products and Collections
How to Upload Your First Product
Go to Products > Add product and fill in:
- Title and Description (benefits, materials, dimensions).
- Price and Inventory (SKU, stock).
- Clear, high-quality images.
Using Collections
Collections allow you to group products (e.g., "Women", "Deals", "New"). You can create them manually or with automatic conditions (e.g., products tagged "Summer").
Step 6: Set Up Payment Methods to Sell in Chile
Payment Gateways
In Settings > Payments you can connect:
- International gateways (PayPal, etc.).
- Local gateways (Mercado Pago, Flow, etc.) through their official apps.
When choosing, pay attention to transaction fees, settlement timelines, and local support.
Pro Tip
Make at least one real test payment to verify everything flows smoothly before launching. Make sure the gateway can pay in CLP to a Chilean bank account.
Step 7: Set Up Shipping Within Chile
Shipping Zones and Rates
In Settings > Shipping and delivery, create shipping zones for Chile (e.g., Metropolitan Region, North, South). Define whether you'll charge a flat rate, by weight, or if you'll offer free shipping above a certain amount.
Practical Recommendations
Get quotes from 1-2 couriers and check rates by region. Use a "worst case" city (like Punta Arenas) to test your highest shipping cost. Adjust your rates so you don't lose money.
Step 8: Basic Taxes in Shopify for Chile
Activate the 19% VAT
In Settings > Taxes and duties, select Chile and make sure the national tax is set to 19% (VAT). Then, on each product, mark whether it charges taxes.
Prices with VAT Included or Excluded
In B2C in Chile, the most common practice is to show final prices with VAT included. Remember that your invoicing system (SII or software) must then correctly separate the net amount + VAT.
Final Checklist Before Launching
- ✓ Browse the website as a customer (home, categories, cart).
- ✓ Place a test order with a real payment.
- ✓ Confirm that confirmation emails arrive.
- ✓ Check the store on mobile.
- ✓ Verify price, tax, and shipping calculations.
Common Questions About Shopify in Chile
How much does it cost to maintain a Shopify store in Chile?
It depends on the plan and apps. The typical cost is the Basic plan + gateway commissions + domain. Optionally invoicing software.
Can I create a store without having a registered business yet?
You can design it, but to sell legally you need to register with the SII.
What should I do first: design, products, or payments?
Recommended order: Basic setup -> Domain and theme -> Products -> Payments and shipping -> Legal.
Need Help with the Setup?
If you want your first Shopify store in Chile properly configured from the start and avoid common mistakes, we can help.
Contact an Expert →